Thursday, October 20, 2011

Lebaran 2011 - Jogja Trip

Last Lebaran holiday I went for a trip to Jogja, my hometown. Initially I planned to drive my other vehicle, but since it was involved in an accident just about a week before Lebaran, then I decided to drive the Retro, even though it was just overhauled. Well, in fact my wife and my daughter said that they actually prefer to go with the Retro than other. Do you know why...??? Here's some reasons why it was really fun to drive Karimun with your family....

I folded both rear seats upward, then I would get a huge space for everything.

I put some mattresses, pillows, and bolsters, along side with all the luggage. 
Look at the big smiles of my wife and daughter... :-)


 Quite spacious, eh..???

Then I installed a 500 Watt DC-to-AC inverter so that I would have more than enough electricity to power up a 3G Router and all phone chargers and my daughter's laptop.


Voila... my daughter was really enjoying the trip since she could always be connected to the internet along the way to Jogja... hehehehe...


The trip was so enjoyable. Even when I got tired driving, I could take some rest while my wife driving the Retro. I can tell you that it was really spacious that I could lay down and get relaxed.


Here's some pictures of Retro while it was in Jogja...

at Wijilan - Jogjakarta


had a lunch - somewhere between Purworejo to Kebumen in my way back to Jakarta

Saturday, October 8, 2011

Everything should wait a little bit longer...

Sh*t happens... sigh...
At August 20, 2011, the Rustanti, my other car (a Toyota Rush), was involved in a group crash. A pickup car hit my car from behind. I was stopped in JORR toll road while the traffic was jammed for a road works, but the pickup driver seems lost his mind and his brakes that it hit me so hard.

The worst thing was that every body repair workshop was stopping to accept new work until after the Lebaran. Damn... So that the repair works can only be started by September 5.

It took three weeks for the body repair works. But when it finished a week ago, I found some details were not satisfactory so I planned to send it back to the workshop.

The consequences is that I have to delay all of my plan to my Retro... *sigh*

Tuesday, August 9, 2011

Land of Confusion

Hehehe... I quoted one of my favorite Genesis song... Land of Confusion...
Even I haven't started the EFI conversion project, I played around with the MegaSquirt.
Damn... it's complicated for such an EFI nubie like me.
Even since this is a completely open-sourced standalone ECU, and I was about to work on to such a small engine like Karimun's, I found almost nothing I could take as references in any forums discussing about EFI conversion projects.... *sigh*

For example, I have to put in the exact specification of the Suzuki Carry stock injectors I would use in my project. Where the hell I could get those kind of data???

Well, let's forget about it for a second. Now I'm playing with the MegaSquirt, connecting it to the MegaStim. It's a stimulator which will simulating signals coming from engines and the sensors. I could play with the rev, the temperature sensors, the O2 sensor, and even the Throttle Position Sensor. The MS is also connected to a laptop running the MegaTune tuning software. Simulating the VE tables, etc. Fun, indeed... hehehe...


MegaSquirt, MegaStim, MegaTune, and Marlboro... what a nice combination... :-D


Wednesday, August 3, 2011

Injection Project - Final Shipment

Finally, today I got everything I need shipped out.
The MegaSquirt ECU package has arrived. It consist of :

1. MegaSquirt MS-1 V2.2 ECU unit
2. Stimulator
3. 12" Wiring Harness

and as 'bonus' I also bought a book written by the founder of DIYAutoTune.com and also contributors in MegaSquirt's community, Matt Cramer & Jerry Hoffman. It's titled "Performance Fuel Injection Systems". I think I would really need this book as I might had enough experiences in carbureted engine, but kinda newbie in EFI world. In fact, when I flashy read this book just now, I think this is really everything I need. Really great readings for EFI rookies. Just like I am.... hehehe...


Now, I have everything ready. So many things to do. I have to do the engine overhaul first. Then starts the Carb-to-EFI project, then move to direct igntion project.

But I just realized what I actually don't have much is.... the time...
I would be very busy at work in the next few weeks until Lebaran. My daughter is going to an extra curriculum activities so my wife would need the Retro to pick her up twice a week.... hmmm... seems like I should start all of my projects after Lebaran.... well, let's see what I can do...

Tuesday, August 2, 2011

Other stuff is coming.... - The EDIS kit

Today I got a package on my desk. Wow, I thought it's the MegaSquirt, but it was not...

Actually this stuff is for my last project. Once I finished the overhaul and then carb-to-EFI conversion project, I will continue with direct ignition project. By installing a trigger wheel and camshaft sensor, and feeding the signal up to the MegaSquirt, it capables to drive a direct ignition system. In this case, I would not need a distributor anymore, making my engine to be a distributorless system.... hehehehe....

Based on some discussions by modification masters in some forums, including MS-forum and even 'modcom', I got a Ford EDIS kit on e-Bay for US$ 51.
It consist is of :

1. Ford EDIS 4 Module w/Pigtail and Mounting Plate
2. Coil Pack
3. 36-1 Trigger Wheel
4. Crank/VR Sensor
5.Plug Wires

Here's the stuff :

Ford EDIS-4 Module Kit

I don't know whether I could use the trigger wheel to fit to the crank pulley or not. But if it's not, I saw somebody replaced it with a motorcycle's sprocket, anyway... and it works...!! hehehe... so, no worries about it...

Saturday, July 30, 2011

Injection Project - Engine Overhaul

I forgot to tell about overhauling the Retro's engine before the carb-to-EFI conversion really started. This morning I went to DTMF, Duta Mas Fatmawati, the spare parts center in South Jakarta. Went straight to my favorite shop, Abadi Jaya, to purchase the parts needed for the overhaul.

I don't know, it's just my day or Oom Joni, the shop owner, got a little bit drunk, or what. He gave a such crazy prices for the parts I ask.

Here's the part list :

1. The packing set. SGP Japan for cylinder head and SGP local for the rest.
2. Piston set. SGP local.
3. Piston Ring set. SGP local
4. Connecting Rod and Crankshaft Bearing Set. All SGP Japan.

For all those parts, Oom Joni gave me for only about one million rupiah.. hehehe... lucky me...

Wednesday, July 27, 2011

Injection Project - One down, many more to go...

Today, I got a letter from the Postal Service. There's a shipment from the USA coming for me... Ahaaa.... too bad it was not telling me which parts has been coming... hmmm... the import tax was Rp 195k. Had my staff collected the stuff up to the post office.

Hey... it's MegaSquirt's Relay Board... hmmm... why this stuff was arrived earlier than the ECU, while I ordered this a couple of days after I ordered the ECU.

Well, anyway I'm happy coz the shipment was quite fast. It took 7 days only to ship from the USA up to my door. Great...!!!

This is the stuff :

Tuesday, July 26, 2011

Merapi Charity Trip

It was in January 2011. Karimun Club held a charity event. The event was to give some donation to the victims of Mt. Merapi erruption. Five KC Jakarta members took off to Jogjakarta. They're Imam, Anton, QQ, Fahmi, and me. In Jogja we met up at local Suzuki Dealer with some other KC Jogja, and KC Semarang members who also came down to this event.

Here's the KC Jakarta team at the hotel. A zillion thanks to Sigit, a KC Jakarta member who has facilitated this fabulous accomodation during our trip in Jogja.

KC Jakarta Team

This is where we met up with the rest KC Jogja, Semarang, and Magelang members. We took some pictures a while before we started to konvoy to Merapi.


The konvoy :


We dropped by to one of evacuation and rescue center to hand over the donation. Took a picture for documentation.


All the way up to the "ground zero" at Mt. Merapi, the view was so terrible. The view of burnt trees and houses were everywhere. I've been living in Jogja when I was a kid, and I've been to this area. I stil remember how this surrounding was so green and beautiful. But now there's nothing left. It's all burnt black or grey covered by the volcanic ashes.

  
Finally we reached the highest ground we can get. The rest path was closed by erruption materials. It was only about 500 meters from Mbah Marijan's house. The road was totally covered by volcanic sand. Need to drive carefully to avoid our small cars being stuck in the sand.
Here we are. The small city cars in Merapi for charity....


Sunday, July 24, 2011

Going Injection....!!!

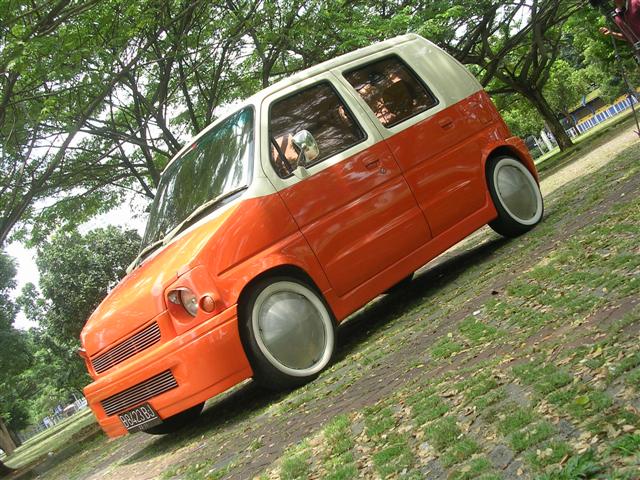
This is my newest project for The Retro... Going injection...!!!

It was about a month ago when I visited a junkyard near my home, owned by Pak Haji Agus.
He has not only one, but seven K10A engines he had just brought down from Singapore junkyards. Some even came complete with matic trasnsmissions. Hmmm... really tempting... imagined if the Retro has a 1000cc turbo intercooler engine and automatic transmission in it... cool, eh..??

But after having a lot discussions with some friend, including Edward and Sigit, I decided not to do the engine swap into the K10A. The reason was that K10A was such a rare engine. It is hard to get the spare parts, even in Singapore. Everything has to be ordered directly from Japan... hufffhhh...

But I just couldn't resist the desire... so I chose to do the conversion of Retro stock carburetor engine into an EFI engine.

I contacted Sofyan, a KC buddy who had done a carb-to-EFI conversion to his Karimun before. His experiment was actually not really satisfying, as the idle control was not working well. He used a stock Suzuki Carry 1.0 injection kit, including Carry's ECU. He's getting frustrated enough so that finally he converted back the engine into standard and sold his Karimun... hehehe... what a waste...

Then I bought the injection kit from Sofyan at a very friendly priced, compared to Pak Haji Agus offered me. Sofyan gave me everything. The Carry intake manifold, all of sensors, injectors (complete with the fuel rail), the throttle body, the ECU, the wiring harness. He even gave Carry stock camshaft and delco as a bonus... hehehe... thanks, bro...

Here's the parts :


I believe that he's failed the conversion because he's still maintained the use of Carry ECU. In my opinion, as we couldn't use the Carry intake manifold (the runner and the plenum is too long to be fitted in Karimun engine bay), and replaced by a fully customized intake, then the ECU should be remapped to accomodate the changes of volume, intake pressure, and so on. Unfortunately, the Carry ECU was sturdy enough, not allowing any reprogramming.
Based on my discussion with some friends and also browsing in some modification forums, including the Indonesia well-known 'modcom', I decided to use the MegaSquirt standalone ECU. It's totally an 'open source' ECU, so that even we can build it by ourselves. They gave everything. The schematic, the PCB layout, the source code, the part list, manual, tuning software... everything's free...!!!  
In fact, there's another way to manipulate the stock ECU by piggybacking with such a component like Dastek Unichip, but I prefer the standalone solution, though.

With my digital electronic background, I found this is very interesting since the unit is really opened for modification. I purchased the MegaSquirt directly from the USA. Since this will be my first time dealing with it, I ordered the fully assembled unit. Next time (in other project, I hope...) I would take the kit option or even build the whole unit by myself.
Additionaly, I also purchased and EDIS Ignition Set from e-Bay. The plan is when I have successfully finished the conversion to EFI project, I would continue it to the distributorless ignition project, since the MegaSquirt can also manage this kind of ignition control as well.... hehehe.... sounds very ambitious, eh...??

But now first thing first. The carb-to-EFI conversion came first to my attention. The MegaSquirt is still on it's way, though.... Seems like I would started the conversion after Ramadhan...

PnP Project

Well... it's not a project, anyway...
KC has a new partner. It's a workshop in Kedoya area. The name is Raser Workshop and the owner is Edward.
He's a good guy so that quickly he became a good friend of mine. His workshop is really good equipped, especially for machining works as his workshop also produces pumps for heavy industries. He's also a member of Suzuki Jip Indonesia, so that he knows Suzuki's engine well... at least much more better than me... hahaha...

Alright, so he offered me to have my engine PNP-ed. It stands for Porting and Polished. Actually it really a hand job... ooppsss... I mean handy works... *grin*
It fixes the bad porting as the engine was produced in the massive production, and also polishing the intake manifold so that the mixture of air and fuel coming from the carburetor could easily flows in to the combustion chamber.

I agreed , as I felt the performance of The Retro was degraded eventually. And it was proven when Edward uninstalled the cylinder head down. The pistons and the valves were full of combustion residue and slug.
The PnP works besides working in porting and polishing, also consist of cleaning the slug from the pistons and valves, and realign the valves. An extra job I ordered to do was the 3-angle valve job. It's like to 'carving' the cylinder head and the valve edge into a 3-angle profile, so that when the valve closed, it was really closed perfectly. I also modified the valve springs, so it would make the valves closed faster when the camshaft lobe releases it, especially in the high RPM.

It's too bad that I didn't have any pictures of the PnP working process.... :-(
I did this PnP in April 2010...

The New Face....

I told you before that actually I was not really happy with the front bumper design, right?
Ok, after about two years since I started to transform my old Karimun to be The Retro, in August 2009 I drove The Retro to other body shop. It's around Meruya. I forgot the workshop's name, but it's completely not important since now the workshop has been closed... hahahaha....

Remember the first design which inspired me to change my Karimun look in to a retro style? The white-blue Wagon-R? This time I write down the precised design. Not only for the front bumper, but also the rear one.

The third day after I brought The Retro in, they successfully managed to build the mocking. Like these ones :

The front mocking

The rear mocking
I totally replaced the rear lamps. I ordered the whole LED lamp design from a lamp specialist at Duta Mas Fatmawati for 600k rupiah a pair. It was based on a 5" head lamp, had the reflector replaced by a PCB contained of about 70 LEDs. It provides a night lamp, turn signal lamp, brake lamp, and reverse lamp, all at one. It was finished by smoke layer. Cool, eh..??

On the front bumper I used the chromed stripes from motorcycles accessories. So after a week, The Retro has a new face...


I also replaced the oval-shaped muffler tip into rounded tip...

And here's the handsome one..... hehehehe....


Alright... enough for exterior and interior works... *planning other projects for it....*

Under The Hood

The look is one thing, but the performance is another thing...
I did some modifications in the engine as well.

I started with ignition upgrades, by putting MSD Blaster 2 coil, MSD plug wires, and SpeedSpark Ignition Module. Wanted to have MSD 6AL ignition module, but it's kind of beyond my budget, though... hahahaha...

I also put additional ground cables, aftermarket Vacuum Advancer, and finally a K&N air filter. Later, I also did upgrades in exhaust sector by applying an aftermarket exhaust system, from a 4-1 header along the way down to the muffler.


Even my cat loves the upgrades... especially the K&N air filter.... hahahahaha...


Didn't see the cat..??


It is cute, isn't it..??  I mean the cat....  hahahaha...

Inside Out Loud...

Pimping out continues.... hahahaha... I told you... I was addicted to it...I really worked hard to save my expenses so that on July 2008, only two months after I did the modification in the Retro's interior, I could managed to finish it all...
Went back to Padi Leather Seat workshop, I asked them to do the leather job for my dashboard, ceiling, A to C pillars, floor carpets, and the steering wheel.

As the steering wheel, I found it in Taman Puring, a junk market in South Jakarta. It was an old (but original) Nardi. I paid it for 200 k rupiah. Quite expensive for it was not in good condition, but the horn knob was original. I found cheaper ones, but they didn't have any original horn knob. No problem. I brought the Nardi to the chrome specialist in Joglo. It took another 200 k rupiah to have it chromed, and be ready to get leathered. It's really not bad, for a refurbished Nardi, as if you buy the new one it would cost about 2 million rupiah... :-D

Almost a week later, here's the new Retro interior :

The dashboard

The dashboard and floor carpets

The whole interior. Ceiling, pillars, all of them...

Do you see the Nardi original signature?

Then, to really finished it up, I need to paint all of the details like the door handles, the power window switch frame, door key lid, etc. I went to Ace Hardware, and I found Krylon spray paint with a very matched color. I painted it all by myself. Really not bad for an amateur painter... hahaha...


Now I'm really satisfied with the Retro interiors... Couldn't get any better...

Inside Out...

In the mid of 2008, my family and Karimun Club (KC) buddies went to Anyer beach for KC's event "Jalan Jalan Karimun". It was totally fun, and made me proud to be KC family member. I really enjoy the event, especially it was  held exactly at my birthday... hehehehe...

At the event I saw one of member's car. It's been fashioned by applying leather seats. Wow... this is what's missing in my Retro. I had never been thinking about doing something in Retro's interior. But I was not in good financial shape at that time... well... should wait for some times...

But God really gave me the best wife in the world... She saw what I saw.. and she told me that she would take care of the leather seat for my birthday present... woohooooo....

Once more, I did some researches for the best seat color theme for my retro-style Karimun. Took a couple of days until I got this from the internet :


It's a retro Buick... or Chevy... well, I don't care... hahahaha... but the seats color scheme was so great...

On the next weekend I rushed myself to PADI Leather Seat workshop, at Joglo, Jakarta Barat. I took MB Tech Camaro semi-leather fabric for my seats. After a tough negosiation, I paid 2 mils rupiah for all seats and doortrims.

It only took 2 days, and my Retro had a new interior like these :

The front seat

The back seat

The doortrim details
And the whole things :


I have to testify that the leather work was a very high quality. Very neat and perfect. The MB Tech was fitted nicely in the Retro.

Looking at the very well job done by Padi, I decided to do some savings into my account to do the next interior job. What?? Yes, I wanted to have the whole interior to be finished in leather.... hahahaha... I know, I was getting addicted to pimp my Retro out....

Friday, July 22, 2011

An "Eye" Lift

Only about two months after the "Karimun Retro" was born, I got another idea...
I need to modify the head lamp. And when I went to Taman Puring, I found a used VW Combi mirrors... hmmm... it made me think... so hard...
Then by December 2007, I went to Nuris Sarni's workshop in Joglo, Jakarta Barat. He's specialized in lamp modification. When I came to him, he was so excited about my idea. What is it? It was to change the headlamp into an old-style VW Beetle... hahaha... VW again... so he made a aluminum-based lamp casing, and put a real VW round-shaped head lamp, complete with VW lamp cap. And not to forget, the VW Combi door mirrors.

Here's the works :


Now, my karimun retro has new looks... an eye lift... hahahaha....


and the "ear" lift.... :-D


And here's the full pose...


Ok.... done for now... would take months after this until I put some other modification to my karimun retro...

History Just Begun....

After a bunch of efforts, doing some research and find all the materials, I started the Karimun Retro Project...

Based on the Blue Retro Wagon-R picture (see my previous post), the most unique things are the wheel. I could easily get the whitewalls, but where should I get the 'moon-shaped' wheel cover?  Browsing at PMK (Pasar Mobil Kemayoran) and Atrium Senen, I finally found it. It's originally a Volkswagen wheel cover. In Indonesia it's known as 'dop moon'. I got it at a VW specialized shop. But unfortunately, it's has 15" diameter, while initially I have planned to have a 14" rims. FYI, the original rim size of Karimun is 13".
While I couldn't get any 'dop moon' in 14" size, then I should changed my plan to find 15" rims.

This is the 'dop moon' looks like :


It took a whole month to find the 15" rims matched to the 'dop moon'. They're Toyota IST stock rims, which have 15" diameter and 4x100 PCD. But the other problem was the rim's offset. It's somewhere around 38, which definitely would  be scrapping my inner fender. Hmmm... then I should asked the body shop to do some 'wide body' modification to the fenders. It's okay... it's just easier to do than to find any other rims... hahahaha...

But the story was not just happy ended. I found another problem. I got the white walls easily, but since it was my first time with whitewalls, I just found that the tyres shouldn't have had any 'rim guard' feature. You know what? The consequences I should take by using the 15" rims is that the tyre's aspect ratio should not be greater than 55. Damned..... The only tyre with 55 aspect ratio, and without any rim guard was Bridgestone Potenza series..!!!  My goodness... it costs me 900k rupiah each... *hiks...*

Then goes to the bumper. I met Oom Alex, the owner of fiberglass custom shop in Atrium Senen. Forgot his shop's name, but he promised to build a new bumper for me.

Got every materials I need, then I went to the body shop near my house. The project started.

First thing to do is fitting out the new bumper made by Oom Alex a couple days before. Hmmm... I think Oom Alex had been loosing some points of my instruction. The bumper was more into 'racing look' than retro style.... Huuffhhh... had no time to reconstruct... I shall continue the project... 


Then the painting works started.


Look at Toyota IST stock rims. Thank God, I have modified my rear spring several years ago to one which has a little bit hard and higher, so that it can accomodate 15" rims nicely. See the small glass windows at the rear end? Soon they will be replaced.... hehehe...

So far, I haven't told you guys about the color I wanted to apply to my Karimun, right? Well, since I adopted Volkswagen's Moon wheel cover, then I was kind of addicted to anything about Volkswagen, especially the Combi model (the bus model of VW). And when I saw retro VW Combi passing me by when I was on the road in Jakarta, I thought that I had to have my Karimun with that color. It's two tone. White - Orange...!!!

After about a month, these are the results :


I added sideskirts, and lower spoiler to the original rear bumper.
And an oval-shaped muffler tip.... plus "Streetrod" emblem, I got from (again) VW shop...


Huuffhhh.... Done...!!! It took about 3 months from scratch... Started by some researches, finding all of the materials, and the construction....  hmmm... not bad... but, am I satisfied? hehehehe... not yet...